Working with Firebase Real-Time database using ReactJS and UIKit and finally launching the web-app to Netlify.

Before starting with this react + firebase project you first need to setup your machine, install NODE and NPM.
Follow this article.
After completing the setup, you need to install create-react-app package, open the terminal and type in the following,
npm install -g create-react-app
Using create-react-app we can get a predefined skeleton for our web application and we don’t need to go around and install all the webpacks.
Before starting the process you can checkout the completed web-app here.
1. Create react application:
In the terminal type the command:
create-react-app <whatever-name-you-like>
**no capital letters in the name
After successful completion of the command do,
cd <whatever-name-you-like> && yarn start
this will start the server and will show you the app in the browser.
Open the folder in any text-editor you find suitable, you will notice the following folder structure.

2. Firebase Setup:
You need to have a google account to use the Firebase services which we are about to use in our project. Login/SignUp using your google account to Firebase.
After logging in click GO TO CONSOLE button available on the top right of the window.
Create a Firebase project by clicking on the Add Project button.

When the project is successfully created, enter the project. Click Add Firebase to Web-App icon on that page.
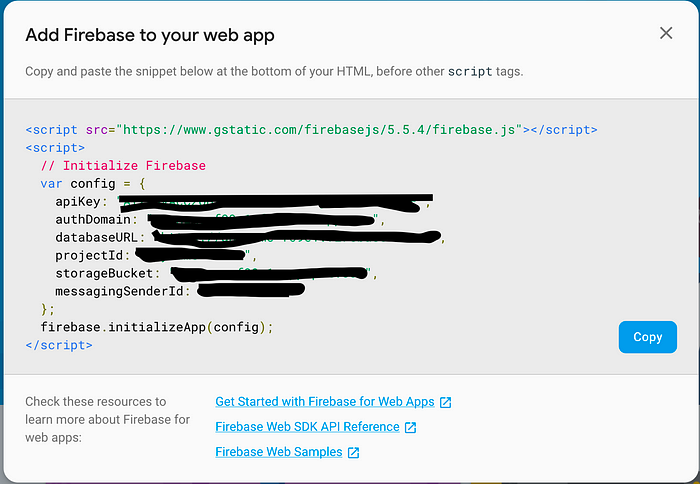
Copy this text and paste it somewhere you can find it later as we will use this credentials to connect our react web-app with Firebase.
Now click the Database link available on the left pane. Then you will find the following,
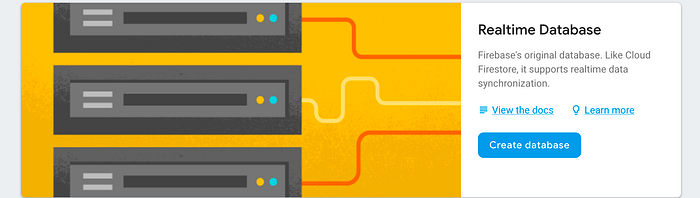
Click on Create Database button,
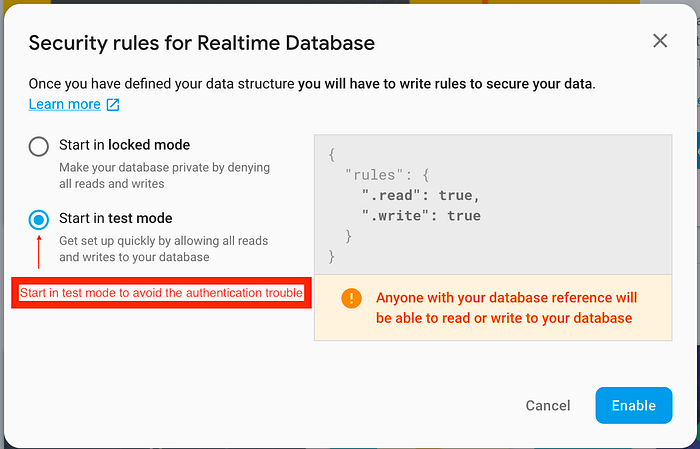
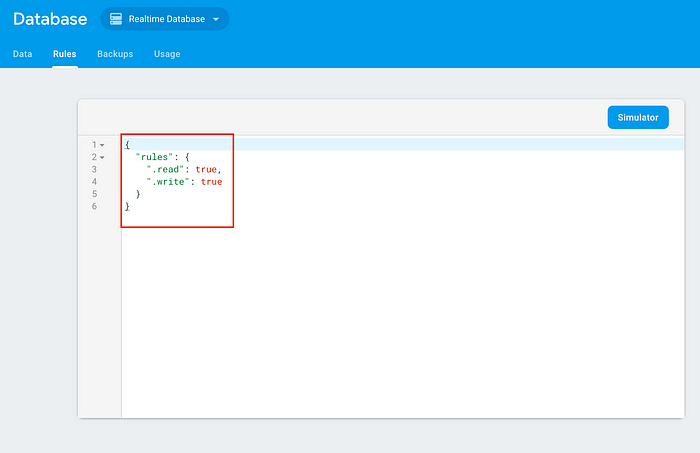
We start the real-time Database in test mode to avoid the writing the authentication code. After clicking enable, in the next window go to the rules and you will find something like this,
In the following steps, click on the Data tab and export a .json file which contains the data you need to work with or download a .json database file from the internet.
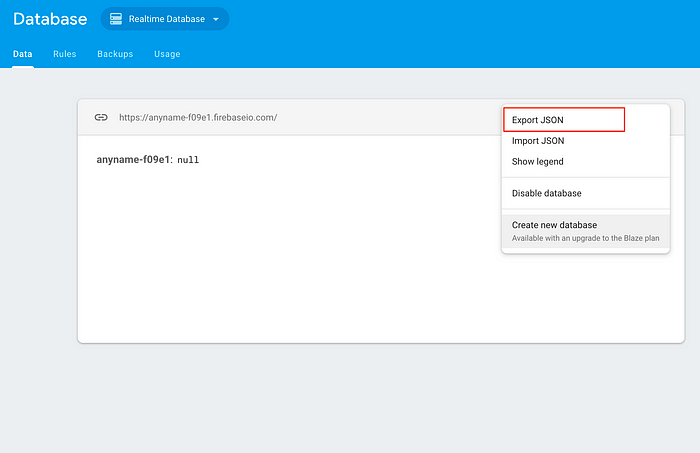

after upload you will get the following screen,
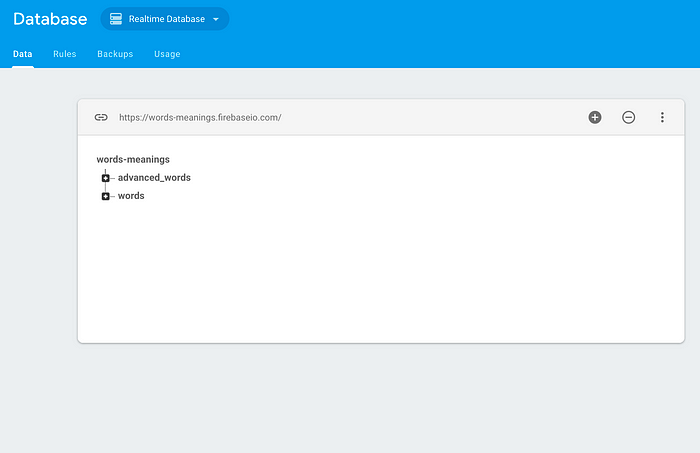
Let’s break it down,
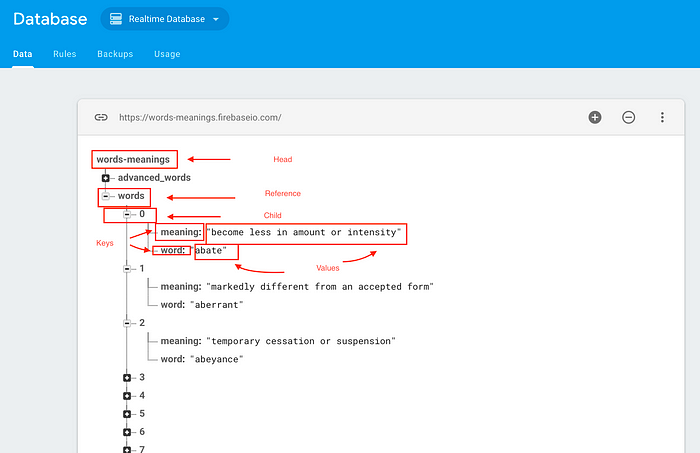
If you push data using any script child names will be randomly generated by Firebase.

Our database is ready now, let’s move on to connecting this database to our React-App.
3. Integrate the database with react:
npm install --save firebase
Run the above given command to install the Firebase package to connect the app with our real-time database.
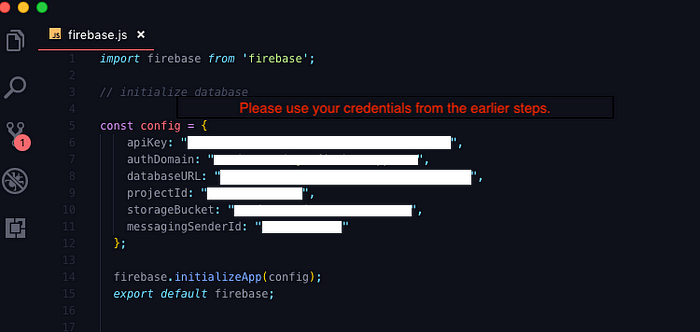
You must have opened the react-app in any editor of your choice until now, create a new firebase.js file inside the src folder. Here we will use the credentials that we have obtained at the start to connect react with Firebase and initialize the app.
Let’s get into the App.js file and start working on displaying the data. App.js file is available inside the src folder.
Import the files and packages,

In our database we have two sets of data under words and advanced_words, we will declare two empty arrays to later store the data snapshot to this arrays.
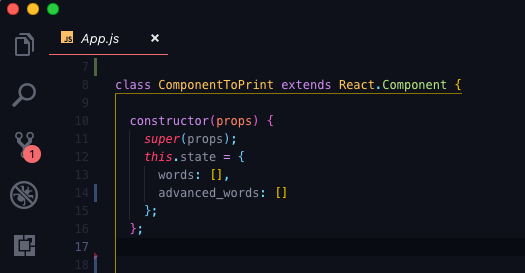
Now we will mount the data available as objects inside each references and push those to our declared arrays to later display the data.
We will use componentDidMount and make a reference to the database and take a snapshot of the current instance of the database and push all the values inside our declared arrays.
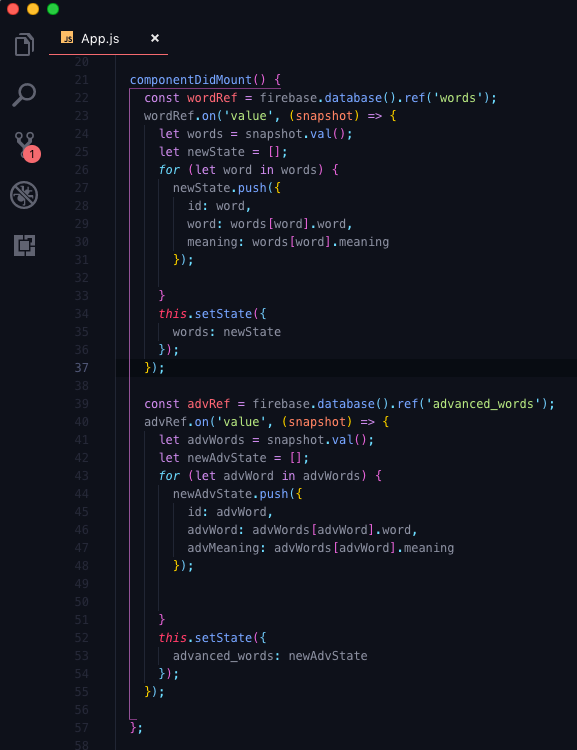
Now all the data available in our Firebase database is available in our words and advanced arrays.
4. Display the data:
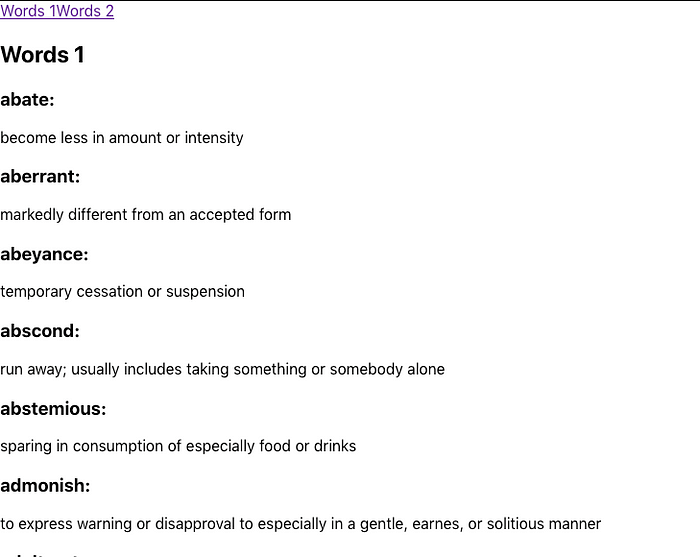
We will use map to get data form the arrays and will return the data on the browser screen.


Save the changes and check if the server is still running, if not go to the react-app folder in the terminal and type in yarn start to start the server.
5. Styling using UIKit:
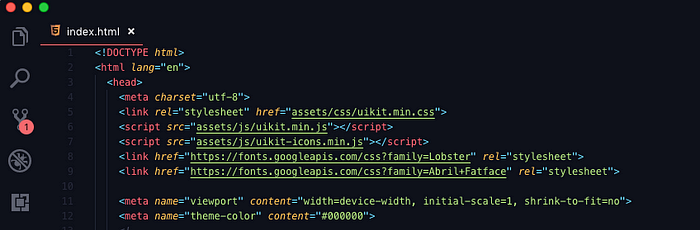
Go to the uikit website and click on the Download UIKIT button to download the css and js files.
Now inside the public folder of the react-app create an assets folder and paste the downloaded css and js folders into this assests folder and match the folder structure.
Open the index.html available inside the public folder and edit it as shown below.
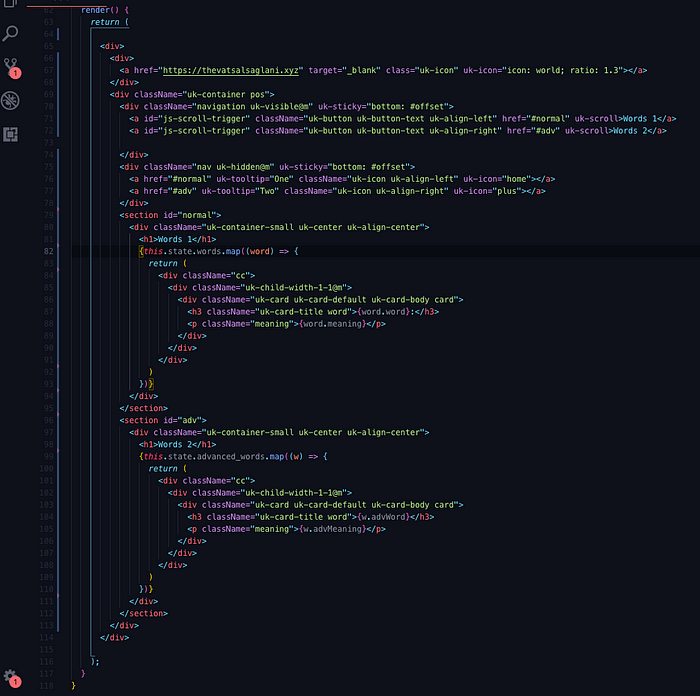
Edit the App.js render as given below,
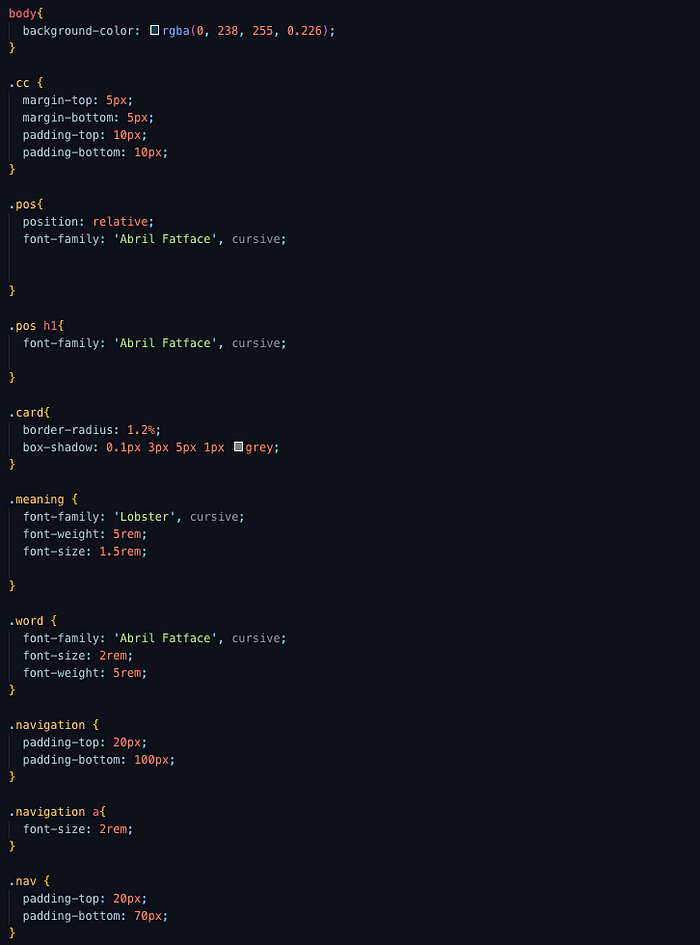
Add the following style elements to the App.css file, delete the given code.
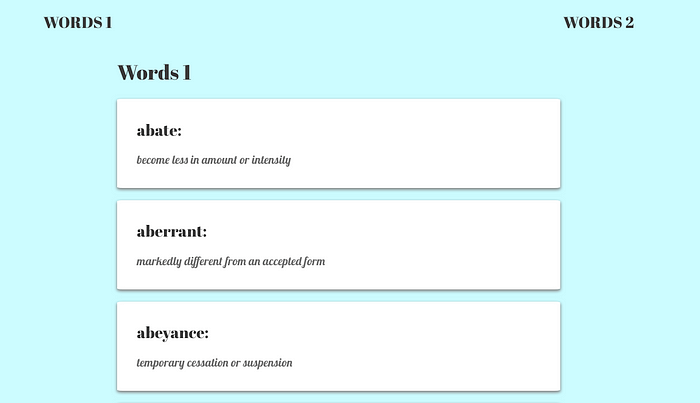
App.cssFinal output will be something like this,
Now to launch this react-app using Netlify first you need to push the code to GitHub, so create a GitHub repository and push the code.
If you don’t know how to use GitHub follow this link.
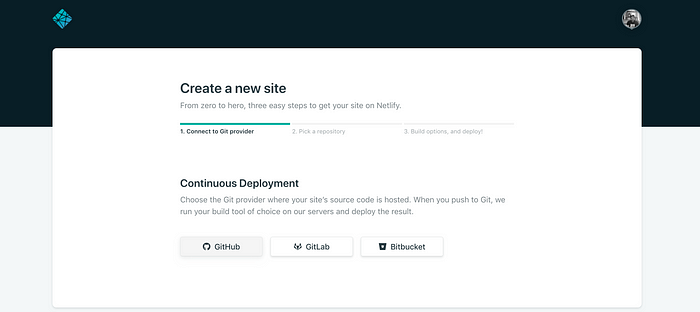
6. Let’s launch it using Netlify:
Go to Netlify and Login or Signup and follow the steps.
- Click New Site

- Choose any git provider
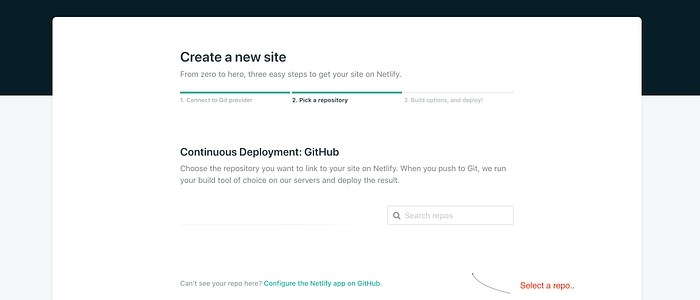
- Pick the repo from your account
- Click Deploy Site
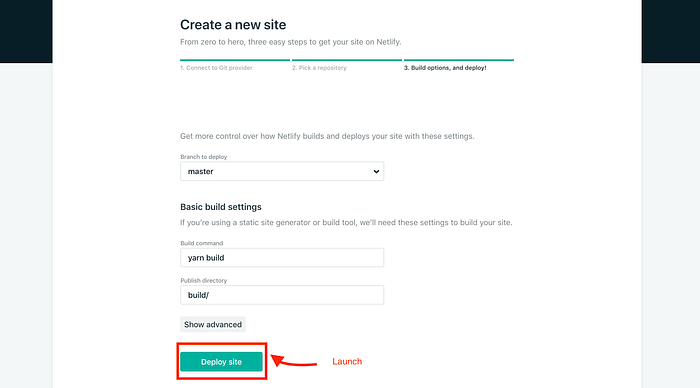
If there aren’t any errors the site will successfully deploy with few minutes.
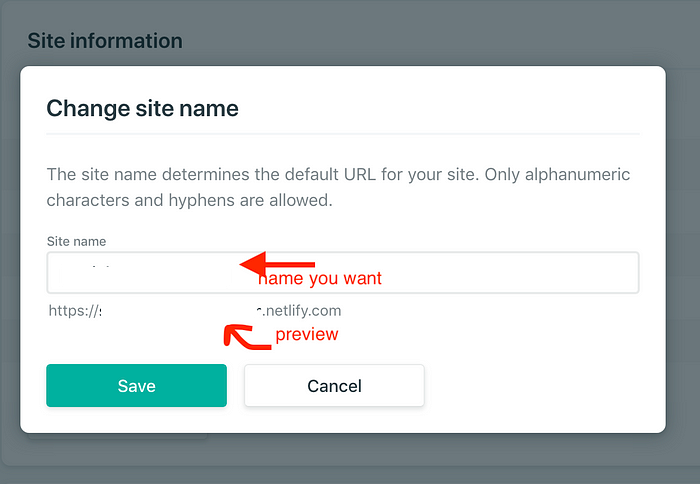
- Change name and site settings
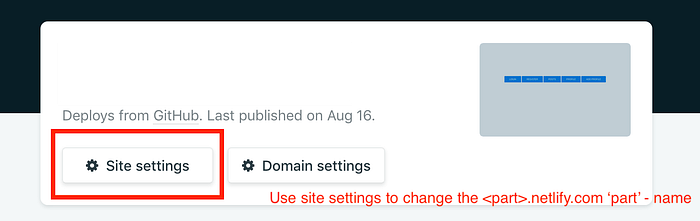
- Type a name of your choice
This will take some few minutes now check the react-app on that link and then you are done for the day.
If there are any mistakes feel free to point those out by commenting down below.
If you liked the the article please give a clap or two or any amount you could afford 😁.
To know more about me please click here and if you find something interesting just shoot me a mail and if possible we could have a chat over a cup of ☕️. For updated contents of this blog, you can visit https://blogs.vatsal.ml
Support this content 😃 😇

I have always believed in the fact that knowledge must be shared without thinking about any rewards, the more you share the more you learn. Writing a blog tutorial takes a lot of time in background research work, organizing the content, and showing proper steps to follow. The deep learning blog tutorials require a GPU server to train the models on and they quite cost a bomb because all the models are trained overnight. I will be posting all the content for free like always but if you like the content and the hands-on coding approach of every blog you can support me at https://www.buymeacoffee.com/vatsalsaglani, ☕. Thanks 🙏